Painting the Interior of Your Home – Part 2

The Next Step to Achieving the Outcome You Desire

Just like a painting project takes longer than initially expected, so did the explanation of it. What I thought would be a short post turned into two and now looks to be three. Next week we’ll see if we’re able to accomplish this.

Last week I told you to start with determining the right paint depending on what the rooms use was. Next was picking your colors which is one of the most important things to the outcome. What, in the beginning, would seem to be easy, often turns into one of the most difficult.

Figuring out what tools you need, is the next step. Painting is like any other project, having the right tools will make the project go smoother, easier and make for a better outcome. Even with basic tools like brushes and rollers there is an amazing amount of variety and options. Then of course there is too many specialty tools to go into.

Brushes:

  • Natural bristle (sometimes called China bristle) for oil-based finishes. These bristles are made from animal hair. The natural split ends of these bristles hold more paint and allow a nice smooth finish
  • Blended nylon/polyester bristle for latex paints. The combination of these bristles provides a durable long-lasting brush. The polyester is great at holding its shape and the nylon holds up well.
  • Polyester bristles work well in latex paints but aren’t as durable as the combination bristles. They provide a smoother application of paint than the combination.
  • Sizes typically range in width from 1” to 4”. Depending on what you are doing will determine which width provides the best result. Smaller brushes work best for trim and small areas. The bigger brushes provide more coverage on large flat areas.
  • Styles or bristle ends also serve different specific purposes. An angled brush works best for cutting in around windows, doors, etc. or in corners. The angled cut gives you more control over the paint line. Flat brushes work best when the goal is to get paint on larger flat surfaces.

Rollers:
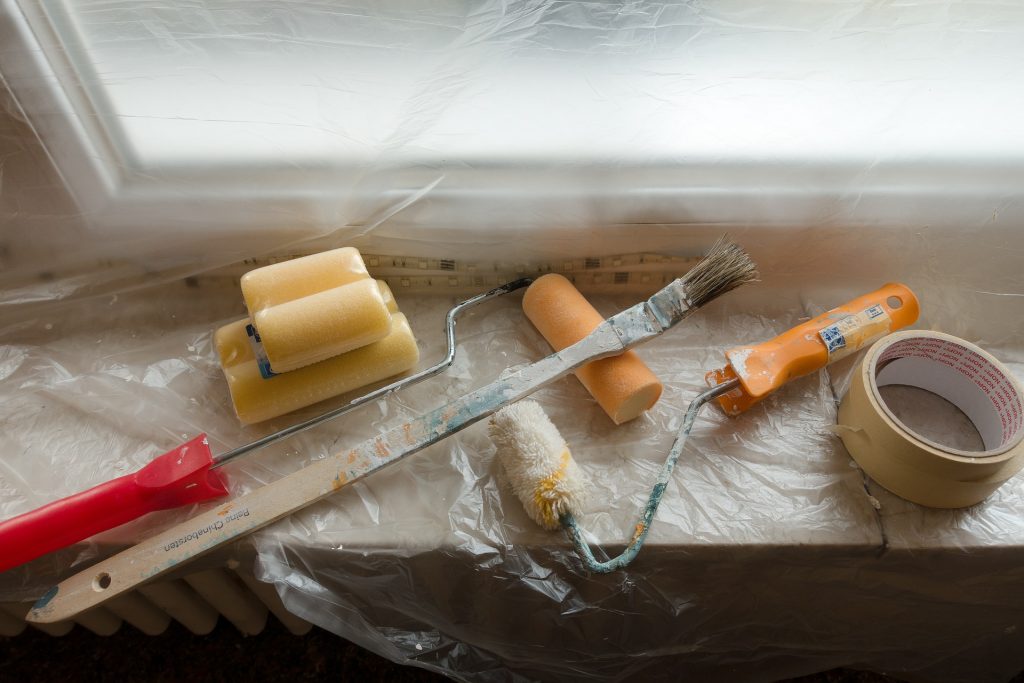
  • Fabrics used for roller covers are similar to brushes in that some are natural, and some are synthetic. The synthetic is the most common and is ideal for latex paints. The natural covers are made of mohair or wool. These work best with oil-based paints. Blended covers provide the best of both worlds. They have the product pick up of wool and the longevity of nylon.
  • Pile depths of roller covers vary from short (almost smooth) to long (3/4” -1”). The short nap is for smooth surfaces. The rougher the surface the longer the nap needed.

Misc. tools and sundries:
  • Drop cloths or plastic for covering finished floors or furniture that will remain in the room.
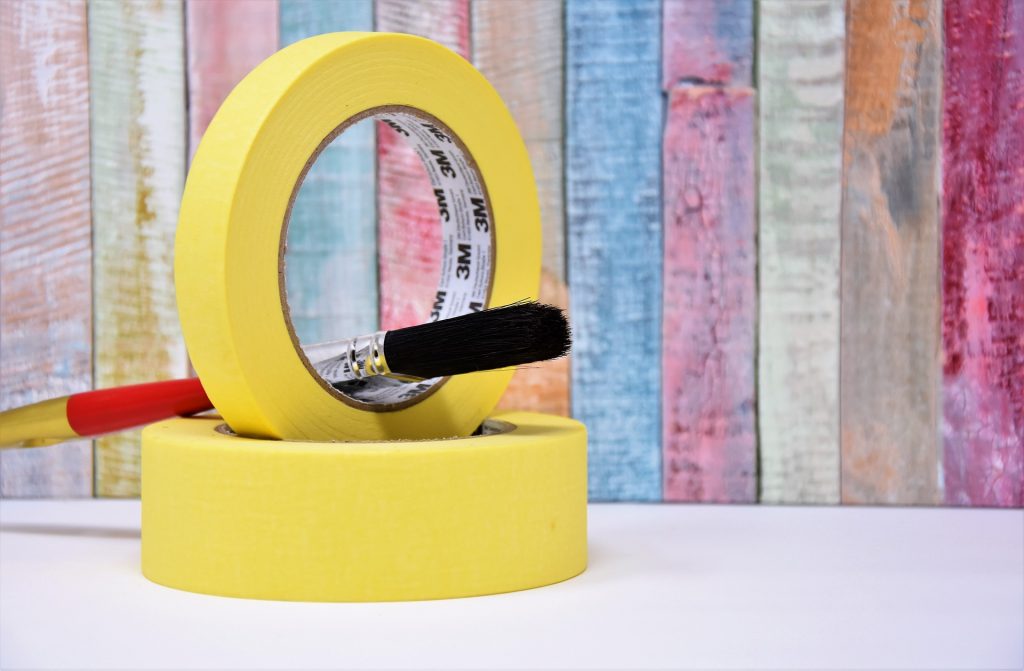
  • Tape and plastic or painter paper for covering windows, doors, floor perimeters, trim, electric fixtures, hardware, etc. Most of us are aware of the blue painters masking tape. It was designed to be used on painted surfaces and not pull the paint loose when it was removed. Now there is green (multi-surface) and yellow (delicate) tape as well.  
  • Caulking, spackling, drywall mud for filling cracks, nail holes and repairing damaged areas. Caulking works best when filling joints and cracks where two different materials come together, for example wood trim and drywall. It allows for expansion when the two things expand and contract at different rates. Spackling is light weight and faster drying than sheetrock mud and works great for filling nail holes and small repairs. Drywall compound dries slower and depending on the size of repair will most likely shrink and need multiple coats but is more durable than spackling.
  • Ladders, stools and planks are needed to cut in the corner where the ceiling and wall meet, the tops of windows and doors or ceiling fixtures. Once the cut in is complete then everything in a typical room can be reached with a roller pole. Some rooms with high vaulted ceiling may require scaffolding.
  • Roller handles, poles, pans, liners and screens are all parts of the paint rolling process. Many times, people don’t distinguish the difference of these things. The roller handle is what the roller cover slides onto. The pole is what the handle screws onto and often is adjustable in length. The pan is what paint is poured into for the roller to pick up the paint from. There are pan liners that fit in the pans which can make the clean up process easier. There are also screens of different sizes that fit into different sized buckets. You can then dip the roller directly into the bucket of paint and remove the need for a pan.

Now we’ve determined the right paint, picked the colors we want and figured out what tools we need. After all of that, it’s time to get started painting.

Next week we will discuss the process of preparing the room and putting some paint on the walls.
If you have any questions or thoughts about what we’ve discussed so far, just send them to us in the comment section below.


Painting the Interior of Your Home

How to Achieve the Outcome You Desire

Whether you’re repainting a room, painting the interior of an addition or the whole house interior for the first time, painting is a transformational experience. The question is what kind of transformation are you after?

Painting can turn the dull into the exciting.

It can also turn expectations into disaster. In this week’s solution I will give you some insight from my forty years of experience to help prevent that from happening.

Where to begin. There’s a lot of work that needs to be done before you ever start doing any physical work. Before you pick up a brush or roller you need to:

Determine the right paint. This should be determined by what the room will be used for. Is it a kitchen or a bathroom where it is likely to be splashed and splattered? Is it a kid’s room where it will have little messy hands coloring pictures on it? Is it a family/living area where most of the activities won’t involve the walls beyond their appearance? Another thing to consider is the quality of the paint. Better-quality paints have more pigment and cover better, wear better and last longer.

  • Latex (water base) – Dries quickly, easy clean up with water, works great on drywall.
  • Oil / Alkyd – Slower drying, more durable, requires mineral spirts for clean up, great for wood trim and areas that need more cleaning.
  • Sheen – This is the amount of reflectivity or shininess of the finish. Not that many years back you had choices of flat, satin, semi-gloss and gloss. Now depending on the manufacturer there are a lot more including pearl, matte, egg-shell, low luster, medium luster, etc.

Pick your colors. This requires an increased awareness to your surroundings. What colors you like, or don’t like? You may not even know why and that’s okay. What matters is how it makes you feel. Look at the interiors of buildings and homes, where ever you go. Look online at similar spaces to the one you’re going to be painting. Sherwin-Williams has an online service that will allow you to experiment with colors on your project before you ever put any paint on the wall.

Get sample cards and see how they look in the room. Every room has its own natural and artificial light. The color will also be affected by colors of things in the area. After narrowing the choices to a few, get small quantities of samples and paint them on the wall to see how they look. At this point the colors can be altered some to get the right color.

You also need to consider the other people who will be sharing this space. They may not like the colors you do. This may not matter to anyone but you, but if it’s important to the others their input needs to be included in making the final decision.

After determining the right paint to use and picking your colors, you’ve completed the first step of your interior paint project. Next week we’ll discuss the tools you need to complete your exciting painting project.

What Are the Benefits to Having A Porch?

How Adding a Porch to Your Home Can Change Everything

When talking about houses one of the things that is discussed with pride or envy is a porch. Porches will make all the difference to how your home feels before ever stepping foot inside. You’ve probably heard it said that you only have one chance to make a good first impression. This is true for your home as well.

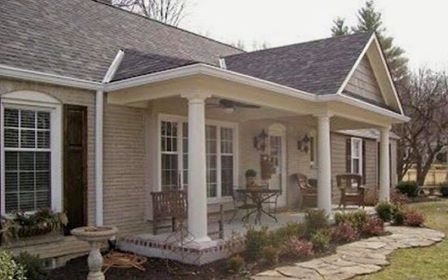
A porch done right can make a great first impression.

Timber Creek Construction is in the pre-construction stages of building a front porch on Will and Ivy Tatum’s new home. They are currently in the process of getting a home set in the country on some family property. The family connection and history lend itself to making the home special. The porch on this home will do just that.

Factory built homes have come a long way from the early days of single wide trailer houses when they weren’t much more than a camping trailer with skirting. I don’t know but having a trailer tongue sticking out on one end and a license plate on the other, just doesn’t feel very long term.

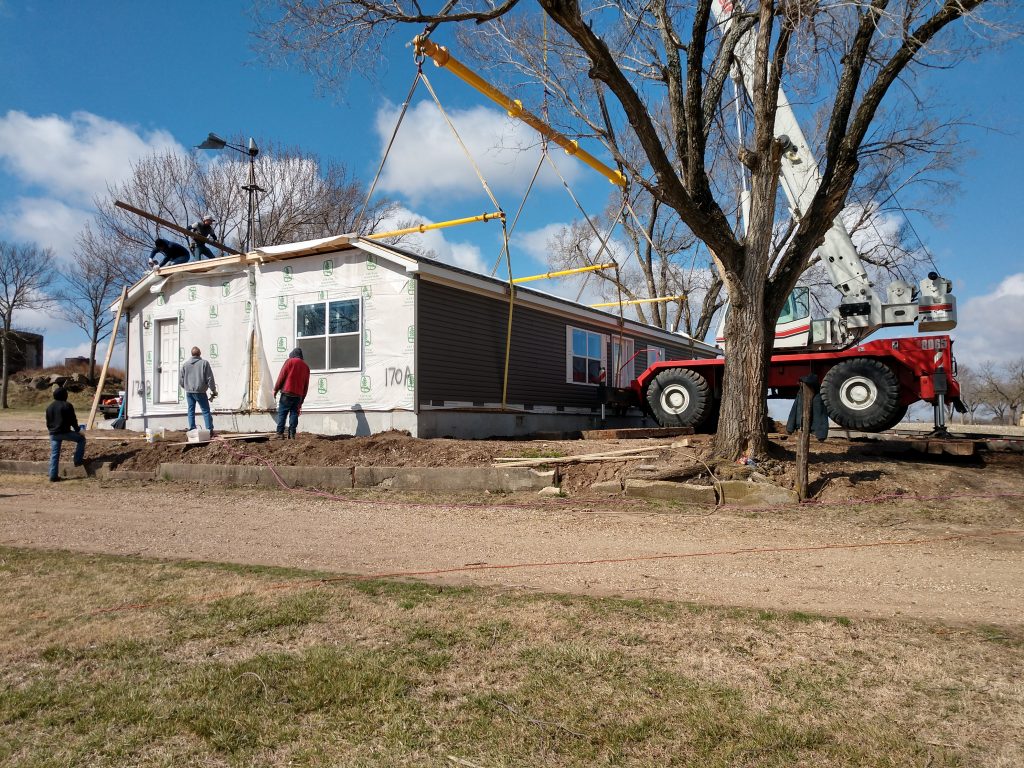
Tatum’s purchased their new Commodore modular home from Shocker Homes east of Wichita in Augusta, Kansas. It is a structurally sound wood framed home bolted to a concrete foundation. (No trailer tongue sticking out on this house.) LG Pike Construction in Arkansas City, Kansas set the home on the foundation with a crane. This process alone was impressive. (Follow this link to see some video.)

Porches vary depending on geographic location, architectural design and purpose. According to Dictionary.com, a porch is, “an exterior appendage to a building, forming a covered approach or vestibule to a doorway.”.

A porch without a roof is not a porch.

A wood structure with spaced flooring is a deck. A concrete slab without a roof is a patio. A raised uncovered concrete area at a doorway is a stoop. All of these serve a purpose, but none of them can offer what a porch can.

The roof portion is what makes all the difference. It’s the part that adds the real value.

Here are a few of the benefits to a porch:

  • Additional protection from the elements (sun, wind, rain)
  • A protected and shaded place to enjoy a cup of coffee, read a book, entertain guests or simply take a nap.
  • Protection from bugs if it is screened
  • Improves appearance of the home’s exterior
  • Increases the value of your home

One of the reasons decks or patios are done rather than porches is the cost. There’s no question that the addition of the roof will increase the cost substantially. Like any construction project that is undertaken, the more that is done, the more that it will cost.

The question…Is it worth it?

Watch the difference that this porch will make to Tatum’s home. Once you see the finished project, I think you and they will both agree.

It was definitely worth it.

Keep watching to see the difference a porch can make.

If you have questions about this project or others contact us in the comments section below.

The Next Chapter in “The Saga of the Grain-Bin Home”

The Hero and Her Guide Are Defeating the Evil Budget Monster

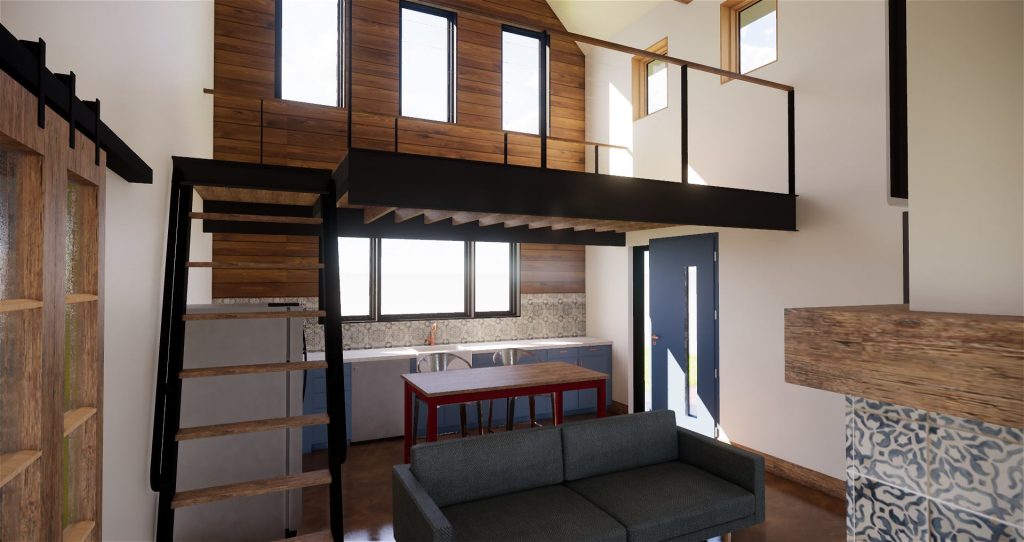
As the voyage continues, Hannah and Mark trek forward on their journey toward the allusive ‘Grain-Bin Home’. An expedition like this is not for the faint of heart. It requires the passionate desire of a hero and the experience and knowledge of a trusted guide.

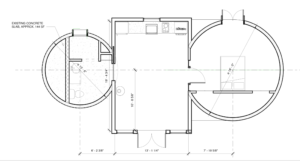
This story began a year ago with the idea of building a small home by repurposing a couple of used grain bins. The two steel bins would be connected by framed wood construction. This idea was dreamt about, discussed, thought about, revised, discussed some more and over the next several months, the preliminary plan emerged.

The collaboration of the hero and the guide in developing a plan before starting on an adventure like this is critically important to achieving a positive outcome. This planning stage is often as long or longer than the building portion. Turning a dream into a reality is the hardest part of the quest. It’s also the most exciting. It is the part where the imagining turns into the doing.

We prepared a proposal based on the preliminary plans. The dollar amount was more than Hannah wanted to spend. So, we went through a list of things that could be changed or removed to get the project closer to the target figure. This included things like radiant floor heating, Pella Designer Series windows with blinds between the glass, and a pass-through indoor/outdoor fireplace.

As we worked on these revisions, Hannah on the drawing and me on the proposal we were presented with some benefits of having an experience guide and the connections that come with them.

First, I became aware of some tongue and grove V-jointed 1×6 pine that a painter had, which had been stained the wrong color for one of his projects. There was enough of it to do the interior wall that we are planning to put stained wood on. It was offered to us at the cost of the wood…we bought it.

Next, I received a communication from my Pella representatives, that Pella Products of Kansas was going to have a “Contractor Garage Sale”. This was to reduce the number of unclaimed, mis-ordered or slightly damaged items taking up space in their warehouse. Hannah and I went to this sale. With some ‘on the spot’ creative solutions we made some idea adjustments and were able to get all the windows and one of the doors needed. This was a price reduction for the customer of over $23,000 from the original proposal. We will spend a portion of that savings on painting the windows so they will all be the same color.

We are on the cusp of transitioning to the doing.

Hannah is finalizing the design changes created by the earlier price reduction list and the windows and door that were purchased. At the same time, I’m finalizing the figures as per those things as well. In the next few weeks Hannah will securing the money needed, and we will be starting on this adventure.

Keep watching for the next chapter in “Saga of the Grain-Bin Home” and share it with others you think might enjoy this story.

How to Dream Big in A Small Space

The Strength of More Than One

A few weeks ago, I wrote about creating realistic expectations for customers and how important it is for the builder to honestly manage those expectations. In that conversation I spoke about Hannah’s project of building her home using grain bins.


This is going to be a dream project for both of us, but it takes planning and working together to make a dream come true. There also needs to be patience and understanding. Too many times people’s dreams become nightmares.


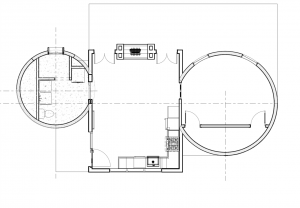
Her most recent floor plan has several changes from the first one. These changes are a normal part of the process (they probably aren’t the last). Some people don’t have the patience for this and plow forward throwing caution to the wind.

On the other hand, some of us tend to plan things to death. No dream is going to be built if there isn’t some action. That’s why it’s important to find the balance of planning and doing.

I think when Hannah’s dream project is finished she will agree that some outside ideas and input helped her project be better than if she hadn’t had any.

All of us have been made to strengthen and support each other. We accomplish more when we work together. In Ecclesiastes 4:12 it says, “…two people can stand back to back to defend each other. And three people are even stronger. They are like a rope that has three parts wrapped together – it is very hard to break”. (ERV)


It’s like the two-horse rule. A single draft horse can pull 8,000 pounds so it would stand to reason that two draft horses could pull 16,000 pounds. But they can actually pull 24,0000 pounds. That is three times as much. Each horse has its purpose and working together can accomplish more.

This is the benefit of collaboration. The working together makes each of us as better as individuals and the dream stronger. Hannah and I are both slower more detailed horses. I think we might need to add a race horse to the team so that we can plow a little faster.


Keep following this blog and Hannah’s for more updates as the dream moves closer to reality.