
These Are About the Physical Process
 This is the 3rd in the series of answering the questions asked by the Scout group. The first week we discussed the willingness of these young people to ask questions, unlike most adults. Last week we answered some basic construction questions.
As was the case last week, most often answers to questions need answers to other questions. With this being a one-sided conversation, I’ll answer these questions without having any specific answers to additional questions.
Do you hire the electrical/plumbing or does the owner?
 This will vary on each project and will depend on the customer’s needs and goals, but as a general contractor I usually provide subcontractors. As an example of varying
  between projects, the owner of the project we’re currently working on is a retired electrician, so he’s doing the wiring on this project.
What equipment do you use most often?
 I think the piece of equipment that I use the most often is a hammer. Some people would probably consider equipment as something motorized or powered. According to Collins dictionary, “Equipment consists of things which are for a particular purpose,” which would include a hammer. If you insist on only power tools being equipment, the second most used piece of equipment would be a cordless screw gun…there are you happy. 😊
Do you prefer to use more manual or electrical equipment?
 Here we are again, manual vs. powered. I definitely “prefer” using electrical equipment or most any power tool over manual. Power tools make most tasks they’re used for easier. However, depending on the task being performed in some cases the manual tool is better suited and more productive. For example, you shouldn’t use a pneumatic nail gun as a hammer to drive a board into place.
How do you dig a foundation?
 The size of the project will usually dictate how the foundation will be dug. If the project requires moving a large amount of dirt, for example a basement, then typically a large excavator (link) will be used. If it’s something
 smaller, we would most often use a mini excavator. (link) If the project is small enough or inaccessible to equipment then it could be dug by hand with a shovel.
These next three questions relate to the dangers of construction.

Where are the dangerous places on a construction site?
Everywhere on a construction site is dangerous. Sure, some are more dangerous than others, but heights are among the most dangerous. Falling is the number one cause of construction site injuries. Some other dangers on a construction site are; power saws, pneumatic tools, electricity, heavy equipment and cave ins of ditches.
How often do injuries happen?
 This answer depends on how we want to define “injury”. Some people would consider a splinter an injury. For this answer I’m going to define injury as something requiring medical attention, i.e. stiches, broken bones, requiring a doctor’s attention, etc. During my forty plus years in construction I have personally witnessed or actually been injured 8 – 10 times. If I take that number of times over the forty years, that’s .000137%. As dangerous as construction sites are and as much construction that’s done, surprisingly it’s not as often as one might expect. The key is working smart and safe.
Have you ever broken a hard hat?
 This is one of the most interesting questions asked and easiest to answer. I can answer it with a resounding NO. This is not to say they can’t be broken, but it takes a lot to break one.
There are still several questions left to answer so next week we’ll look at types and specialty forms of construction.
If these questions raise additional questions for you, send them to us in the comments below and well answer them.

 As I pointed out last week, due to the number of questions I’m going to divide them into different topics to keep the posts from getting too long. This week I’ll start by answering some basic construction questions. Keep in mind that asking and answering questions is communication and communication is a two-way process. This means that before I can answer questions fully and accurately, I need some questions answered.
 This is the most common first question. It only makes sense; cost is a critical part of deciding whether to build. It’s also one of the most difficult to answer, especially when asked without any specifics.
 The answer to this question will be directly connected to the answers of the last question. Size, design, level of finish, etc. will all effect the length of time to build a new house. An average 2000 square foot home will take 6 – 9 months.
 Once again, the answer is going to depend on specifics of the house. Let’s just answer the question using the average 2000 square foot house that we have been using. Let’s assume that it’s going to have wood floor joists, sub-floor, wall studs, wall boxing, ceiling joists, rafters, roof sheathing, siding, windows, doors, cabinets, etc. All these things combined will be around 40 pounds per square foot. That means the wood used in a 2000 square foot house will weigh around 80,000 pounds, or 40 tons.
 There are some cases where houses are framed using steel, but typically that’s not very common. There are some steel things commonly used, like nails, screws, joist hangers, reinforcing steel in concrete, etc. Sometimes steel beams and posts are used for supporting heavier loads and wider spans. In a typical wood framed house, it takes around 10 pounds of steel reinforcing, fasteners and misc. per square foot to build. This means that our 2000 square foot wood framed home would have around 20,000 pounds or 10 tons.


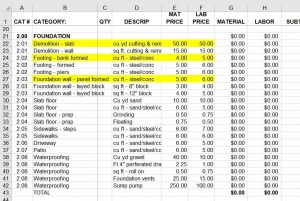
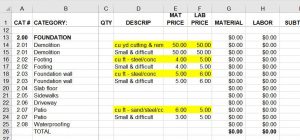


 In the first post of this Blueprint for Building A Better Proposal series, I wrote about this communication problem and that


 In the first post of this Blueprint for Building A Better Proposal series, I wrote about this communication problem and that


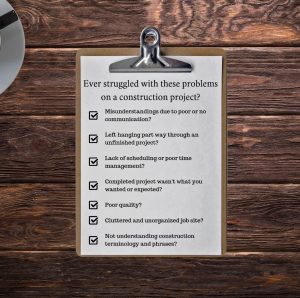

 Our site had gotten old and stale, as websites go. This was pointed out to me a couple of years ago by